Tag Archives: handmade

Mee-yow!! We love the new Cats Cradle Dress pattern from Decades of Style

Hi there! It’s been a long while since our last blog post! I hope you’ve been enjoying your summer, wherever you are.

NSB - Cats Cradle dress header

I am very excited to share details about the latest pattern from the Decades of Style micro-line, Decades Everyday: #105 Cats Cradle Dress! This sweet sundress style features a fit-and-flare silhouette, patch pockets, and cage detailing at the neckline. I especially love how this style looks a little vintage and a little modern.

DoS 105 Cats Cradle Dress

When I first saw the pattern artwork for this dress, I got so excited. Beyond the fact that the new style is awesome, the illustration makes me super happy – I totally love the vibe of the model!

For materials, I selected lavender gingham check seersucker and red Petersham ribbon from the Ribbon Room. Though the pattern calls for 1/2” wide ribbon or tape, I used a 3/8” width and it worked perfectly.

NSB - Cats Cradle materials

One of the coolest components to this pattern is you use a tear-away interfacing to make the caged-ribbon neckline.

NSB - Cats Cradle tear away stabilizer

The instructions helpfully recommend using a temporary glue stick to adhere the ribbon to the stabilizer, which I did not use, but very much wish I had (the ribbon came out a little loose on my finished dress, so I will absolutely use this technique next time).

The fantastic notion I did employ? Lite Steam-a-Seam 2 tape! This product was super handy when applying my ribbon to the neckline.

To help me fit this dress pattern, I used my trusty E.S.P. pattern as a foundation when tracing off the bodice pieces of the Cats Cradle. This was one of the first times I’ve attempted this method with such great success.  It definitely helps that the bodice styles are similar and from the same pattern company. Aside from basic bodice fitting, I hemmed this skirt 1” longer than the allotted 2” hem. (I didn’t add any length to my pattern pieces; I simply made a smaller hem). I am absolutely thrilled with the results.

NSB - JV Cats Cradle dress

If you’re wondering about the crowd-pleasing capabilities of this style: I wore this dress to the wedding of one of my dearest friends and I received a zillion compliments. It’s a definite recommendation from me.

I love this dress and can’t wait to make another. In fact, I have a rad vintage jacquard ribbon that is just begging to be used for this style…


Do you have any summer garments in the sewing queue? Let us know in the comments below!

Nancy’s does Me-Made-May ’16 – days 25-31

June has arrived and, though we are thrilled for the arrival of summer, we are a little sad to see May go.

We had so much fun participating in Me-Made-May! It is, truly, one of my favorite things we’ve ever done as a store. Thanks to all of you for helping to make it such an enjoyable event!

NSB - header MMMay16 days 25-31

Day 25:

Tamara wore three handmade pieces: a coat sewn in linen/cotton suiting, a knit top, and a silk crepe-de-chine skirt! The pattern for her topper is the Palvi, from Lotta Jansdotter’s book Everyday Style. She drafted both her shirt and skirt patterns.

Ellen also donned a trio of handmade garments! Her round-neck coat pattern is from Casual Sweet Clothes: Favorite Pieces for Every Day by Noriko Sasahara; she used a linen/cotton Ikat, a perfect fabric pairing for the simple silhouette. Her top and pants are the Mimosa ensemble from Sewing Workshop, which she sewed up in yarn-dyed linen/cotton.

Kristina wore a second iteration of the Kiomi tunic and a knit tube skirt of her own design. For this version of the Kiomi (originally a dress pattern in Lotta Jansdotter’s Everyday Style), she used washed silk dupioni and created a hi-low hemline. The effect is cool and elegant. Her tube skirt is rayon/spandex jersey; a similar pattern is KwikSew #3765.

Jessica wore a button-down shirt with Peter Pan collar of her own design. She used plaid linen/cotton for a perfect picnic look! Though the pattern for this shirt is unavailable (she drafted it herself), Burda #6840 has similar details.


Day 26:

Ellen was ready for the weekend in her cropped jacket, which she sewed up in a cotton with crewel-work details! Pattern is #009 from Betsy Ross, which is, sadly, no longer in business. For a similar look, try Vogue #9190.

Jessica prepped for the weekend in a restyled vintage skirt! Longer, pleated and a touch too small from when it was purchased twelve years ago, she breathed new life into the skirt her scissors and sewing machine. For a similar pattern, try KwikSew #3794.


Days 27 & 28:

Sadly, we did not have a chance to take photos on either day 😦


Day 29:

Kitrina wore a pleated cotton piqué skirt with petersham ribbon details at the waist and alençon lace trim at the hem. The original Burda pattern is now discontinued; try Butterick #5756 for a similar pleated skirt pattern.

Kristina paired her asymmetrical Kiomi tunic with her favorite straight skirt (McCall’s #3830). The hi-low hemline of her tunic perfectly showed off the border print of her skirt!

Jessica wore a boldly patterned silk/cotton lawn dress. She used Simplicity pattern #2497 (now discontinued) featuring a ruffled neckline and blouson details at the waistline. For a similar-but-updated silhouette, try Vogue #1343.


Day 30:

Kitrina wore a fabulous dress with a draped collar and sash. She sewed the now-discontinued Vogue pattern out of yarn-dyed polyester suiting. For a comparable style, try Butterick #5850.

Ellen got ready to bid adieu to me-made-May by sewing up the Betsy Ross Cropped Jacket pattern with a fabric that she’d had in her stash for at least 15 years! The simplicity of the jacket style was perfectly paired with the yarn-dyed beaded linen. Though the Betsy Ross pattern company in no longer around, try Vogue #9190.

Jessica wore the matte jersey dress she discussed in our post on planning for me-made-May. She used the bold print to make a pattern from the BurdaStyle S/S 2016 plus size special magazine (pattern 417B), a casual dress with cocoon silhouette and draped armholes. For additional coverage, she lined the dress, and added openings to the sides seams for a ribbon sash.


Day 31:

For the final day of me-made-May, Tamara wore a striped tee-shirt style dress paired with a printed cotton lawn overdress. The knit dress, made of rayon/spandex jersey and bound with fold-over elastic, is McCall’s pattern #6612. Her Japanese lawn dress is the same Marcy Tilton pattern from day 11, Vogue #8876.

Izzie, our resident milliner, wore a summer straw hat of her own creation! She used sinamay straw and vintage trimmings for the perfect look! If you are in the Seattle area this weekend, Izzie will be showing her hats at a trunk sale at the Beppa store; be sure to check it out!

And for a final me-made-May farewell, Jessica ended the month in the same dress from the first day, her favorite Decades of Style pattern, #2003 1920s Hazel’s Frock. For something new, she added a handmade straw braid hat, which she made in classes with Izzie and trimmed with millinery flora from our Ribbon Room!


Thanks again for joining us for Me-Made-May! We had a blast participating and look forward to doing it again next year!

Nancy’s does Me-Made-May ’16 – days 19-24

How quickly is this month zooming by? It’s hard to believe the unofficial start of summer is nearly here!

Our celebration of all things handmade is still going strong, and we are so appreciative of our staff’s willingness to play along. Let’s see what the Nancy’s employees wore on days 19 through 24!

NSB - header MMMay16 days 19-24

Day 19:

Ellen wore a blouse made of lightweight linen with a pale blue stripe. The now-discontinued Marcy Tilton pattern from Vogue (style 8709) features alternate grainlines on the different pieces, which are enhanced by the stripe in Ellen’s fabric.

Jessica wore her latest version of Decades of Style pattern #2003 1920s Hazel’s Frock. For this rendition, she left off all the scarves, added a slight A-line to the silhouette, and shortened it for an easy summer shift!


Day 20:

Jeannie did a little print mixing, combining a rayon challis skirt and a top made of polyester with metallic sheen. Her top is the beloved Scout Tee from Grainline Studios with a modified sleeve. She used Butterick #4136 for her six-gore skirt.


Day 21:

The good news is that we were so busy on the twenty-first that we were (sad news) unable to take photos of employee ensembles.


Day 22:

The twenty-second was unofficially our “bold patterned skirt” day. Kristina celebrated by wearing her bias-cut Tedra skirt with her Kiomi dress-turned-tunic (both patterns from Lotta Jansdotter’s book Everyday Style). Her skirt was made from 1″ black-and-white cotton gingham (trimmed with red bias tape) and her tunic from lightweight red rayon challis.

Jessica wore a four-gore eyelet skirt with bold coral polka dots! This pattern is one of the projects from our fantastic Absolute Beginning Construction class, which is intended for sewers with little-to-know sewing experience! The pattern is exclusive to our class, but Burda 6818 is a similar style!


Day 23:

Continuing the multi-gore mini-theme of this post, Kitrina wore an eight-gore skirt made of polyester crepe. She scalloped the bottom of each panel and enhanced the style lines with white pick-stitching. The original pattern is now discontinued, try Butterick #6179 for the same silhouette!

Ellen looked lovely in a jacket made of lightweight denim, lined with printed cotton lawn. The pattern, Vogue #9096, features five curved panels on the right front side.

Jessica wore a circle skirt made with one of our favorite fabrics, a lightweight ponte double-knit! She drafted the skirt using the classic formula for a full circle skirt, attaching it to an easy, curved waistband. If drafting your own pattern sounds daunting, try KwikSew #3637 for a comparable look.


Day 24:

Ellen wore a swingy jacket, style D from the book Casual Sweet Clothes: Favorite Pieces for Every Day by Noriko Sashara. She used the coolest wool crepe with dimensional embroidery, a designer end piece from Prada.

Izzie wore a beautiful silk dress and a hat of her own creation. Her dress, Vintage Vogue pattern #8728, was made with fabric from Anna Sui. She stitched her hat from straw braid and trimmed it with ribbons and millinery flora from our Ribbon Room.

Jessica wore a top of her own design, made from a lovely bamboo rayon jersey. The shirt features a bateau neckline in the front and a deep-V in the back. Jessica draped her top on her dressform; if you don’t have a form of your own, try KwikSew #4174 for a similar base pattern!


Thanks so much for joining us for our third round-up of Me-Made-Makes!

Join us next week for the final installment!

Nancy’s does Me-Made-May ’16 – days 13-18

It is hard to believe we are more than halfway through May! Where does the time go?

Our round-up of staff-made garments is much shorter this time (and skips a couple days when we didn’t get pictures), but still full of great makes. Let’s get started!

NSB - header MMMay16 days 13-18

Day 13:

Jeannie wore an ensemble of handmade garments, consisting of a dress and topper. Her dress began as a Scout Tee, the fantastic pattern from Grainline Studio. Jeannie made a few alterations to the pattern, including scooping in the body through the waist and lengthening the sleeve, and then added two gathered tiers to create a skirt. She used an incredibly soft linen for this dress, which has the perfect weight and drape to compliment the style. Jeannie’s topper is KwikSew pattern #4104; she used a lovely printed linen/viscose for the body and lined it with rayon/acetate satin, making this an ideal spring coat!


Day 14:

Sadly, we forgot to take pictures this day 😦


Day 15:

Kitrina wore a wool bouclé jacket featuring cool antique silver buttons on a placket of layered petersham ribbon and a restyled knit top. Sadly, the original jacket pattern from Vogue is now discontinued; try Butterick #5235 for a similar look!

Kristina wore a rayon tunic and novelty print cotton skirt. Her top is the Kiomi dress-turned-tunic style, taken from Lotta Jansdotter’s book Everyday Style. She used her favorite straight skirt pattern (McCall’s #3830), which perfectly features the Frida Kahlo-inspired border print!

Jessica wore the simplest iteration of her favorite pattern from Decades of Style, #2003 1920s Hazel’s Frock. For this version of the dress, she used a cotton/rayon/nylon jacquard and left off all the scarves from the original design, for a look that is as modern as it is vintage. She also finished the bias trim at the neck and armholes to the outside, using the reverse of the fabric as face, and hemmed the skirt to the outside, for a simple, graphic look.


Day 16:

Whoopsy! We forgot to take photos on this day, too!


Day 17:

On the seventeenth, Tamara wore a knit top and woven skirt. She used KwikSew pattern #4027, altering the neckline, to make this rayon/spandex top in navy heather. Her pleated skirt, a self-drafted pattern inspired by a Japanese style, was made out of the coolest fabric: a yarn-dyed plaid canvas over-dyed in black, which fades with every wash to reveal more of the plaid.

Izzie joined in on the Me-Made-May fun, wearing a handmade wool tunic and a straw hat of her own design! The pattern for her top is the Schoolhouse Tunic from Sew Liberated designs. You may recognize her hat from our post on trimming hats for the Kentucky Derby!

Jessica wore her newest, most summery version of the beloved E.S.P. dress (Decades Everyday #101). Made of striped Italian cotton/linen shirting, this dress features a longer, pleated skirt and stripe play. Do you remember this dress from our post about Decades of Style patterns for spring?


Day 18:

Tamara wore a bright and cheery skirt made of Charley Harper print organic cotton canvas. She drafted the skirt pattern, which features pleats that hang from a yoke. For a similar pattern, try McCall’s #7022!

Did you have a premonition about Jessica’s me-made-make for the eighteenth? She wore another version of the E.S.P. dress from Decades of Style (Decades Everyday #101)! This time, she used cotton lawn in a yarn-dyed plaid, just perfect for a picnic!


We hope you enjoyed this installment of our Me-Made-Makes! Join us next time; we promise not to skip so many days again! Or simply follow us on Instagram to see our outfits every day 🙂

Nancy’s does Me-Made-May ’16 – days 1-12

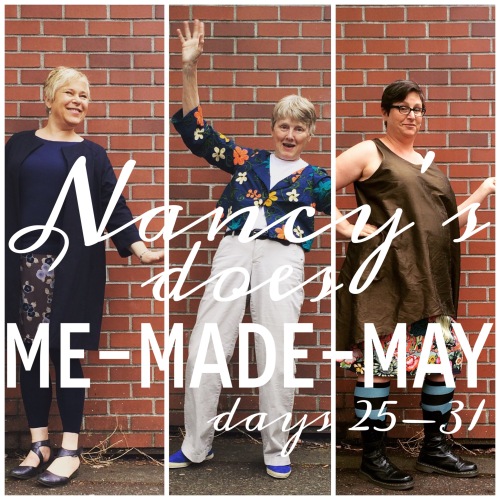
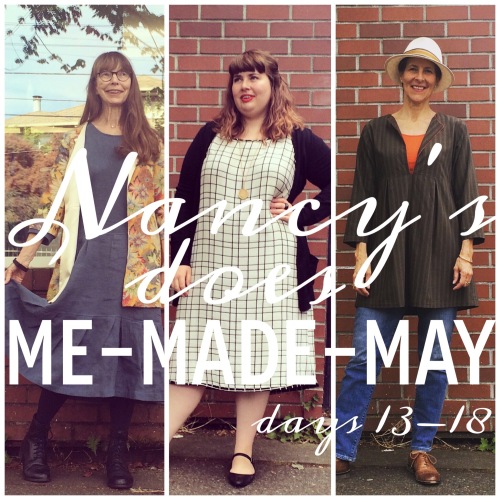
We are having a blast with Me-Made-May! It is so much fun to see the sewing community sharing their makes, everyday, and even more fun to partake.

NSB - MMMay16 days 1-12 header

This is a loooonnnng post, so without further ado, here is a round-up of Nancy’s staff during the first twelve days of Me-Made-May!

Day 1:

Helping us kick off the event, Kitrina wore a tunic made with KwikSew pattern #3601. She sewed it up in polyester georgette featuring multi-colored polka dots!

Jessica wore a modified version of her favorite Decades of Style pattern, #2003 1920s Hazel’s Frock. She used the skirt-scarf pattern from the original look inserted in the side seams to create a handkerchief hem and sewed the dress from a rayon/nylon blend with fabulous drape.


Day 2:

Ellen wore a linen jacket made from a now-discontinued Butterick pattern. The style has handy patch pockets and a cool, draped lapel that features the selvedge of the fabric! For a similar look, try McCall’s #7200.


Day 3:

Tamara wore a silk crepe-de-chine skirt and knit top with a modified neckline. The original skirt pattern, now discontinued from Vogue patterns, boasts a full circle silhouette on a yoke; luckily, KwikSew #3637 is currently available and very similar! Tamara used KwikSew #3766 for the top, modifying the neckline to a bateau.

For the third day, Jessica wore a blouse made of printed silk crepe-de-chine, made from Decades of Style pattern #5003, the 1950s Collar Confection blouse. This blouse style has a sweet draped collar and shaped, vented short sleeve.


Day 4:

On May the fourth, Tamara wore her Given a Chance dress, pattern #102 from Decades of Style‘s microline Decades Everyday! She sewed up the dress in a Japanese cotton dobby, featuring pixelated renditions of Japanese landmarks. You may recognize the dress from our post on spring clothes made with Decades of Style patterns.

Kristina wore her newly finished bias-cut Tedra skirt, made from 1″ black & white cotton gingham and bound at the hem with red bias tape. The skirt pattern is from the book Everyday Style by Lotta Jansdotter. We mentioned this skirt in our Planning for MMMay16 post, as a project Kristina was working on. Way to go, Kristina!

Jessica wore Decades of Style pattern #5008, the PB&J skirt. This 1950s style features bias-cut side panels, double pleats, and nautical button detailing. Jessica used a striped polyester/rayon/spandex suiting to enhance the alternating grainlines and added vintage German glass buttons for extra flair. Ahoy!


Day 5:

Kitrina wore a modified version of the same KwikSew tunic, this time featuring a hi-lo hemline and princess seams. Her fabric choice, a floral print polyester georgette, looks perfectly breezy in the modified silhouette!

Ellen wore a swingy tunic, sewn up in a rayon/linen blend. She used Butterick pattern #6099, which features inverted pleats at the bust, a functional button placket, and collar variations.

Kristina wore an easy a-line skirt, Vogue pattern #9063. She sewed up the pattern in a lovely printed cotton lawn, similar in hand to Liberty’s Tana lawn, but priced much more accessibly!

Jessica wore her version of the Three’s a Charm jacket, pattern #103 from Decades of Style! Made in a Japanese printed cotton/linen canvas, this easy-to-make and easier to wear third piece features stylized darts in a cute silhouette! Learn more about this jacket, and see a second sample, over here!


Day 6:

Tamara wore a handmade ensemble on the sixth. Her coat comes from the Japenese pattern book Happy Handmade Sew Chic by Yoshiko Tsukiori and she worked it up in a soft linen. The skirt was patterned off a store-bought style; she layered a beautiful black border lace over an Anna Maria Horner printed cotton broadcloth for an elegant, but easy wardrobe addition. For a similar skirt style, try KwikSew pattern #3877.

Jeannie wore a silk plaid dupioni wrap skirt, made with McCall’s #5430, and carried two handmade bags! The larger, striped canvas bag is from Lotta Jansdotter’s book Everyday Style. Her green ultrasuede bag is the Hatoto pattern from the blog Yoshimi the Flying Squirrel.


Day 7:

Rounding out the first week, Ellen wore the Gallery Tunic from Liesl & Co. She sewed it up in a soft cotton plaid broadcloth.


Day 8:

On Mother’s Day, Kitrina looked incredibly lovely in an ensemble from Decades of Style. Her printed silk blouse is pattern #2502, the 1952 Wrap Blouse, which features a true wrap front and two buttons at the yoke. Enhancing the style is pattern #4006, the 1940s Arches Skirt, which she sewed up in wool twill.

Kristina wore her go-to straight skirt pattern, McCall’s #3830. She used a cute novelty print (Mice on Bikes from Lizzy House) and bound the hemline in contrasting turquoise bias tape.

Jessica wore her other favorite Decades of Style pattern: Decades Everyday #101, the E.S.P. dress! The dress is a classic fit-and-flare style with raglan sleeves and she’s made it many times. This version was made with Liberty Tana lawn; read more about it on her blog post!


Day 9:

Ellen donned a great jacket on the ninth day: Pearl from Sewing Workshop. This style features an easy silhouette with drawcord detail at the neckline for the addition of ruching. She used a lightweight polyester, making this the perfect casual spring jacket.


Day 10:

Tamara wore an easy blouse featuring a keyhole neckline with tie closure and deep side vents, which she made from printed silk crepe-de-chine. She also wore a ponte knit skirt, modeled after a store bought style. Sadly, the original Vogue blouse pattern is now discontinued; for a similar look, try McCall’s #7248 or Kitrina’s favorite tunic style, KwikSew #3601.

On the tenth, Jessica wore her inspired by the runway dress. Modeled after a Bottega Veneta style that retailed for $11,000, her version features lace layered over a digital print rayon challis and geometric lace trim at the armhole. She used Burda pattern #6914 to achieve the silhouette with a gentle cocoon shape.


Day 11:

Tamara wore a dress made with a border print cotton lawn. In cutting out the pattern (Vogue #8876), she found she didn’t have quite enough of the print to construct the dress with the border running along the hemline. Ingeniously, Tamara reworked the pattern and achieved a very cool look!

Ellen had plans to attend a Seattle Mariner’s game after work, so she showed off her team spirit and her sewing skills, by wearing a blouse constructed in cotton lawn, boasting the M’s colors! She used Vogue #8927 for this easy-going great shirt.

Kristina wore a self-drafted a-line skirt, sewn up in lovely, easy-to-wear rayon/linen. Try McCall’s #7197 for a similar pattern!

Jessica also wore a self-drafted skirt, this time a dirndl silhouette, featuring an embroidered-border calico cotton. For a similar pattern, try KwikSew #3794.


Day 12:

On the twelfth day, Ellen wore Anne Klein tunic pattern #1509 from Vogue. She sewed it up in a printed cotton double gauze, proving this style looks good in casual and dressy fabrications!

Kristina wore two patterns from Lotta Jansdotter’s Everyday Style. She shorted the Kiomi dress pattern into a tunic length and sewed it up in rayon challis for the perfect breezy summer top. She used washed cotton ticking to make the Owyn pant pattern, for a casual pant style.

Jessica wore a jacket of her own design that she originally created for the Great Jacket Challenge of 2009. The challenge was performed by the staff at Nancy’s for our 31st Anniversary Sale, wherein participating staff used Vogue pattern #1036 (now discontinued) as a base to make a jacket of their choosing. Jessica’s version, with a high-peplum waist and double-breast closure, was constructed of boldly striped cotton canvas.


Wow – that was a long round-up! If you made it this far, thanks for sticking it out until the end! We are sharing our me-made-makes everyday on our Instagram (you can find them directly here), if you would like to see them on the daily. Our next round-ups won’t be nearly this extensive, but just as enjoyable! See you next time!

Trimming a hat for the Kentucky Derby

The Kentucky Derby is just a week away! Though we live many states away from the actual event, we still have the urge to celebrate it in style, which can only mean one thing: fabulous hats!NSB - Kentucky Derby header

We checked in with coworker and milliner Izzie, who kindly shared her hat-trimming expertise with us. She brought in several of her undecorated hats and used ribbons and millinery trims from our Ribbon Room to create several different looks.

The first hat was hand blocked from a natural color straw braid, and features a rounded crown and wide, curved brim. NSB - Kentucky Derby straw braid 1 untrimmedWorking in a rich red color palette, Izzie selected millinery roses & berries, vintage ribbon, and veiling for trimmings. NSB - Kentucky Derby straw braid 2 with trimmingsShe created a wide, layered bow from the ribbon as a base, formed a second bow from the veiling, and then nestled the roses and berries into the center of the bows. NSB - Kentucky Derby straw braid 3 trimmedThe resulting look is bold and lush, without going over-the-top.


The second hat was blocked as a cloche from a raffia-like, vintage yellow straw.NSB - Kentucky Derby raffia cloche 1 untrimmed To enhance the cheery hue, Izzie chose trimmings in sunny tones, including picot-edge vintage ribbon, leaves, and two styles of flowers. NSB - Kentucky Derby raffia cloche 2 with trimmingsShe began by encircling the base of the crown with the ribbon and tying it into a multi-looped bow. After arranging the flowers and leaves, she affixed them atop the bow. NSB - Kentucky Derby raffia cloche 3 trimmedThe final look is a sweet and simple monochrome topper, perfect for wearing indoors or out!


The crown and brim of the third hat were blocked from two different straws. NSB - Kentucky Derby double straw 1 untrimmed
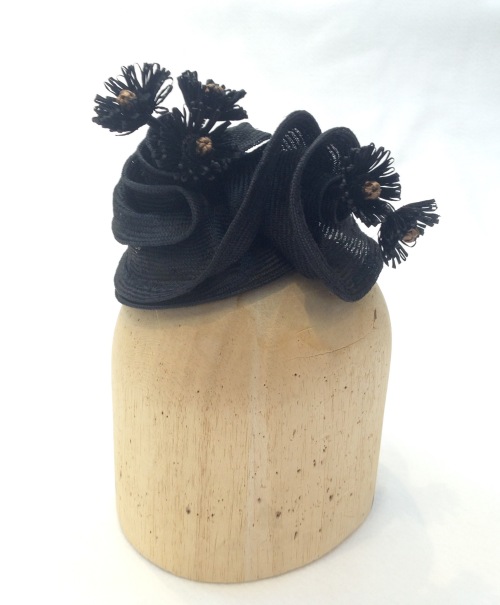
In keeping with the color palette provided by the two straws, Izzie selected trimmings with a neutral feel. NSB - Kentucky Derby double straw 2 with trimmingsGreen leaves, little mushrooms, pale yellow black-eyed susans, and a brown poppy all lend to a more natural look. NSB - Kentucky Derby double straw 3 trimmedThe final arrangement is chic and modest, and would look at home at a derby party, a garden party, or rowing a boat on a sunny summer afternoon.


For those with a more subdued sense of style, Izzie also shared the perfect simple way to trim a hat: ribbon! For this straw fedora, she chose a vintage striped ribbon. The varied stripes in five colors look especially smart when tied in a clever knot.NSB - Kentucky Derby fedora with ribbon


Will you be attending a Derby party? What kind of hat will you wear? Share the details with us in the comments below!

Planning for Me-Made-May ’16

Have you heard of ‘Me-Made-May’? It’s a fantastic annual challenge set up by Zoe at So, Zo…What do you know?, encouraging people who make, refashion, and upcycle garments to actually wear the things they create!NSB - planning for MMM16 header

We at Nancy’s are no strangers to wearing the garments we make, but we love the idea of encouraging everyone in the sewing community to celebrate their making achievements. As such, we are pledging to partake in Me-Made-May! Our staff will endeavor to wear handmade garments and accessories every day, which we will be sharing on our Instagram account. We will also take a closer look each week at what people have made with a blog post!

In preparation of this event, I’ve asked the staff to share some of their current sewing projects that will be worn for Me-Made-May. Check out all the fun details below, and join us throughout May to see the finished garments!

If you are interested in participating, head over to the So, Zo blog to read more about the challenge and consider signing up! We hope you will participate!


Kristina is using two of the patterns from the possibly-perfect-in-every-way book Everyday Style by Lotta Jansdotter.lottajansdotter91744jf-1077x1200

Kristina is making the Tedra skirt, using a bold black-and-white 1″ gingham check, cut on the bias.

She is also making the Kiomi dress – a sweet, swingy style – using an open weave rayon plaid.


Amy is making up a blouse using the fantastic Sewing Workshop pattern, Florence. Her fabric of choice is 100% cotton chambray in a gorgeous orchid color.

The Florence boasts 14 buttons on a real placket on the front, a faux placket in the back, and button cuffs; Amy selected fun buttons with a confetti look to really make the details sing.


Ellen is making a coat from the Japanese pattern book Casual Sweet Clothes: Favorite Pieces for Every Day by Noriko Sasahara.casualsweetdress1Ellen is using a woven linen/cotton Ikat to make the round-neck coat with turn-up cuffs.


Marilyn is making a smart skirt and blouse ensemble. She will use Burda pattern 7136 to create a button-down blouse of Indian cotton voile, woven of pink and palest green. For her skirt, Marilyn selected Vogue pattern 7937, a semi-fitted, straight-style skirt with hemline detailing. Her fabric is a slinky rayon crepe with a fun jungle print.


Jessica is adding two dresses to her wardrobe for May. The first pattern comes from BurdaStyle magazine (Spring/Summer 2016 Plus size special). Drafted for knits, the dress features a casual cocoon silhouette, with pleating at the bodice and interesting draped armholes. Her fabric is matte jersey in polyester/spandex with a graphic navy on red print.

For her second dress, Jessica is modifying her favorite pattern (Decades of Style 2003 1920s Hazel’s Frock, used last year for her 1920s ensemble) to reproduce an original 1920s sailor-style dress found on Pinterest. For her version, Jessica picked out cotton lawn for the body (variegated hot pink stripes on lavender ground) and Indian cotton voile for the sailor collar (hot pink with coral cross-weave).

Because the lawn is lightweight and somewhat sheer, Jessica will make the bias-cut slip from Folkwear 219 Intimacies to wear underneath, using rayon/acetate satin faille in rose/gold.


Are you currently working on any spring sewing projects? Are you inspired to join in the Me-Made-May fun? Let us know in the comments below!

Get to know a Nancy’s employee: Izzie

I am very excited to share today’s “get to know” interview. In addition to working in our Ribbon Room every Tuesday, this employee is also a talented Seattle milliner. As she is both an employee and a friend of Nancy’s, this extended interview includes questions we ask of our vendor friends! Please join me in welcoming Izzie.

NSB - gtk izzielewis header

Who are you?

I’m Izzie Lewis and I am a milliner. I also work at Nancy’s.

How long have you been acquainted with Nancy’s? How long have you worked at Nancy’s?

I’ve been acquainted with Nancy’s for 20 years or so, through millinery and classes with Candace Kling.

I think I started working at Nancy’s in 2008, so I’ve been with the store for about 8 years.

NSB - IzzieLewis pink straw

Izzie models a gorgeous pink cloche constructed from vintage straw braid, trimmed with a ribbon rose handmade using Candace Kling’s techniques.

How long have you been sewing?

Well, I’ve been sewing for as long as I can remember, but I was in second grade the first time I sewed a garment from a pattern.

What was your first sewing project?

I made a little cotton top with a sailor collar that zipped up the front. It was very cute. It had little puffed sleeves. The fabric was navy blue with white anchors.

Tell me about your business.

I make custom hats and I teach hat making in my studio in West Seattle. I work in straw, felt, and fabric, and find that whatever material I am working with at the time is my favorite. That can make it difficult to change seasons.NSB - IzzieLewis felt hat from scrap

How did you get started in millinery?

I started making hats when I found out that you could actually make hats. It hadn’t really occurred to me before that. I used to wear a lot of vintage hats, so when I found out I could make them myself I started pursuing hat making.

I actually met a hat maker – Wayne Wichern – while shopping at a fabric store in downtown Seattle. I was wearing a hat and he came up to me and said, “I really like your hat. I am a hat maker, if you’d ever like to have a hat made…” and I was like, “What? I can have a hat made?!” I had him make a hat for me and it was through that experience that I started studying with him. Years later, he explained that the day we met, he had just picked up his business cards and he was so excited about it that he came right up to me and gave me a card. He said that he wouldn’t have done that except that he was excited to have business cards.

My background is in architecture, which is still that idea of constructing things. When I began making hats, the architecture firm where I worked – Workshop 3D – had a gallery within the space. My boss asked me to do a millinery show, so I started putting together group shows every spring and fall. These shows became one of the foundations of the millinery community in Seattle.

What is your most recently completed project?

I make garments for myself on occasion. My most recent garment was the sheer overdress/printed cotton underdress for the Nancy’s anniversary sale.

I’m also currently completing a variety of straw hats for a group hat show, which is happening on Saturday, April 2nd. The show, which I am doing as part of the Millinery Artisan Group Northwest, takes place 10am-4pm, at the Phinney Neighborhood Center.

NSB - IzzieLewis parisisal straw vintage roses and veiling

A parisisal straw hat is trimmed with vintage veiling and roses

Do you have a most memorable or favorite project?

I did a fun project in 2015, which started out as a little tweed top hat. I bought a yard of fabric and made the top hat. I had fabric left over, so I thought I’d make another hat. I made a cloche, and there was still fabric remaining, so I made a little cap. Then I just decided to keep on going until I had used every scrap of fabric. I think I ended up with seven or eight hats, the last one being this tiny headpiece on a headband.

It was a fun project that kind of developed on its own, but is in keeping with what I like to do, which is use scraps. One of my signature hats is a felt hat that is made of scraps and pieces left over from other hats.

NSB - IzzieLewis felt cloche made from scrap

Scraps from at least five different hats come together to create this fantastic cloche

Another memorable project was The Great Blocking Marathon. I invited students (former and current) and local hat makers to help block nearly every form that I have in the studio. We worked for 2 days, with a break to sleep and we blocked approximately 50 hats!

NSB - izzielewis great blocking marathon

Hat blocks used for The Great Blocking Marathon

What project is next?

This coming Saturday, April 2nd I have the group show at the Phinney Neighborhood Center. I will be there selling spring and summer hats. There will also be a special exhibit as part of the show: we were given a millinery challenge to create an “elemental” hat. The hat I am contributing evokes the element of whimsy. It was created from the scraps of an oddly sized straw cartwheel, which I combined with some vintage trims (editor’s note: “cartwheel” is a name for a large, unblocked piece of straw or felt).

NSB - IzzieLewis hat element of whimsy

‘Whimsy’ is perfectly captured by curvilinear form and vintage blossoms

In general, I’m working my way through a lot of the vintage trimmings and do-dads in my studio, attempting to use them all. For most of my hats, the trims are an integral part of the design, not just added on. For this new project, it’s more that I am making these hats and adding these vintage pieces. The challenge is: am I taking these vintage materials and making pieces that look like vintage pieces, or am I taking these vintage materials and creating something that looks new and fresh? I’d love to be able to have my pieces look fresh and modern.

NSB - IzzieLewis sinamay straw vintage irises

Vintage irises are the perfect trimming for this sinamay straw hat

What do you love most about Nancy’s?

Well, the Ribbon Room, of course! I love all of the conversations about different design ideas that happen in the store, and how helpful and knowledgeable the staff is. And seeing all the projects that people bring into the shop.

Thanks, Izzie! It is such a delight to see what our very talented staff creates!

If you are interested in contacting Izzie about having a custom hat made, or in taking classes with her, find her on Facebook or her website. And if you are in the Seattle area this coming Saturday, April 2nd, be sure to check out her show at the Phinney Neighborhood Center! More details can be found on the show’s event page here.

All photographs in this post courtesy of Nancy’s Sewing Basket and Izzie Lewis and may not be used without express permission.

Fabulous spring patterns from Decades of Style & Decades Everyday

We’ve talked before about our love for independent pattern company Decades of Style and our love is still going strong! For the Sewing & Stitchery Expo this year, we decided to once again feature patterns from their fantastic catalog, with a special focus on the Decades Everyday micro-line. We created a fun collection of garments that would be perfect additions to any spring wardrobe!

NSB - DoS spring wardrobe
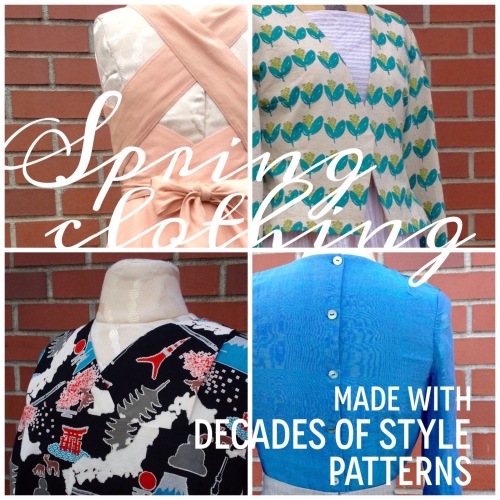
All of our Decades of Style samples look so wonderful we want to share them with everyone! Check out all our makes below.

The two newest Decades Everyday patterns are separates: the Three’s a Charm Jacket and the Buttons & Bows Blouse.

For the expo, we were lucky enough to have an exclusive prerelease of the brand new Buttons & Bows Blouse! This fun new style has two options for pussy bow ties, buttons up the back, and has a gorgeous curved hemline.

Jeannie, who made the beautiful Dolce & Gabbana inspired dress for our anniversary sale, whipped up a Three’s a Charm in multi-color patterned wool. Though the basic pattern is unlined, she opted to add a lining and finish all edges with bias tape made from sweet printed lawn. The result is a perfect transitional weight jacket. She also constructed a Buttons & Bows using one of our all-time favorite fabrics Indian cotton voile in an iridescent blue/violet color. Jeannie made the version with the shorter ties and used a double layer of voile through the body for more coverage.

We paired the blouse with the 1940s Empire Waist Trousers from the original line, made in a lovely wool/linen suiting with a subtle lavender pinstripe. The waistline of the trouser combined with the ties of the blouse give this ensemble a sweet sailor effect!


Tamara made the Decades Everyday Given a Chance Dress. This shift dress is a great example of sophisticated simplicity, with a bias-cut, origami-inspired yoke and attractive double bust dart. Tamara’s version was made from textured Japanese cotton with a print that features 8-bit interpretations of Japanese landmarks. This style is easy to make and easy to wear!


Jessica used two Decades Everyday patterns for a sweet ensemble: the E.S.P. Dress and the Three’s a Chance Jacket. For her jacket, she used a floral print Japanese linen/cotton, constructing her version according to the instructions and leaving it unlined. For visual interest and a retro touch, she finished the facings and hems with a decorative running stitch. The result is a Three’s a Charm that is the perfect layering piece for spring.

Jessica’s E.S.P. dress was sewn from a striped linen/cotton shirting with a seersucker look. The stripes were placed horizontally on the bodice and vertically on the skirt. Though the E.S.P. is drafted as an unlined pattern, Jessica opted to line the bodice and skirt, leaving the sleeves unlined. Inspired by the stripes of the skirt, Jessica constructed the skirt with pleats, rather than gather as per the original instructions.


Marilyn, who created the fabulous Dries Van Noten inspired jacket for our anniversary sale, used the Siren Sundress pattern from the Decades of Style original line, sewing it up in sorbet colored cotton voile. This pattern, originally from the 1940s, features a unique wrap-in-the-back silhouette: long straps cross at the open back and wrap around the front waist to tie in the back. The pattern is drafted with a lined bodice and unlined skirt and straps. For additional coverage under our lightweight cotton voile, Marilyn added a full lining to the dress and doubled the straps. It’s the perfect sundress!


Will you construct any new garments for your spring wardrobe? Do you participate in Me Made May? Now’s a great time to get started! We’d love to hear what you are planning; tell us in the comments below!

HeartFelt Valentines

Valentine’s Day is just around the corner! How are you planning to show a little love this year?

Inspired by our 2016 intention, I decided it would be fun to make valentines that last! Enter our “heart felt” valentines!

NSB - heartfelt valentines header

These handmade valentines are a sweet and unexpected way to show your loved ones how much you care.

I took inspiration from some of my favorite Valentine’s Day memories and came up with three fun styles for these valentines. The first is inspired by classic conversation hearts.

NSB – heartfelt convo hearts

The second style is inspired by the valentines I made as a child using paper doilies & construction paper.

NSB – heartfelt doily valentine

The third style has extra dimension and makes a great ornament, perfect for giving and decorating!

NSB – heartfelt ornament

Aren’t they sweet? I can’t wait to deliver them to all my favorite people!


Ready to make some heart felt valentines of your own? These valentines require very few supplies and are simple enough that they could be a fun project to make with children!

SUPPLIES

For all versions:

  • Download our heart templates here: NSB heart felt valentines pattern sheet
    • I recommend printing on cardstock to make a sturdy template. I find it easiest and most accurate to trace the template directly onto the felt, rather than pinning a paper pattern and cutting around.
  • Felt in any colors you prefer (I recommend a wool blend felt, though synthetic craft felt is fine).
    • My color palette was inspired by classic conversation hearts (pale pink, yellow, light blue, green, white, purple) and I added a few, more saturated colors for accents (red, magenta, hot pink, light grey).
  • Embroidery floss in colors that match your felt and also contrast it.


For conversation hearts:

  • Fiberfill (a 12 oz. bag will yield many hearts!)

For ornament style:

  • Thread to match felt for larger hearts (optional)
  • Short piece of ribbon (~3”; optional)

TOOLS

  • Needle for hand embroidery
  • Scissors
  • Removable ink pen (I recommend water-erasable)

For doily style:

  • Pinking shears or scallop edge scissors (optional)

For ornament style:

  • Sewing machine (optional)

DIRECTIONS

Conversation Hearts

  1. Using our template (NSB heart felt valentines pattern sheet), cut two hearts out of felt. On one heart, write out your message using the removable ink pen. Use a favorite saying or make up something special!NSB - heartfelt ch prepare pieces
  1. Using red embroidery floss, embroider your message. I recommend using two strands of floss and a backstitch. Use more floss for a bolder look.NSB - heartfelt ch embroider message
    When complete, rinse out ink, if applicable.NSB - heartfelt ch rinse markings
  2. Place two hearts together, with message side out. Using embroidery floss that matches the felt, blanket stitch around ¾ of the heart. NSB - heartfelt ch blanket stitch together 3-4
    I recommend starting in the dip at the top and stitching around one side down to the bottom point. Then, starting in the same place at the top, stitch around the heart bump on the other side and leaving a space of about 1.5” open for stuffing. Do NOT cut your floss at this stage, as it will be used to sew the opening closed.
  3. Pull a small handful of fiberfill from the bag.NSB - heartfelt ch poly fill
    Stuff the heart with fiberfill. I recommend starting with the bump on the partially sewn size, then stuffing the second bump, then the full body of the heart.NSB - heartfelt ch stuff heart
  4. When heart is fully stuffed, pin the opening, and sew closed with blanket stitch.NSB - heartfelt ch pin opening closed
  5. You are now ready to start a conversation with your sweetheart!NSB - heartfelt ch finish blanket stitching
  6. Want to make these a bit faster or more simply? These look just as adorable as solid colors! Just cut out a few hearts in each of the felt colors and then pair them at random.

    Use floss in one of the two colors (or a different color altogether) to create your blanket stitch, providing a little visual interest.

    These two-hue hearts look great on their own or mixed in with the conversation hearts!NSB - heartfelt ch convo and two color hearts


Doily Valentine

  1. Using our templates (NSB heart felt valentines pattern sheet), cut one large heart and one small heart in two different colors.NSB – heartfelt doily cut large small hearts
  2. With your scissors, cut freeform scallops around the edge of the large heart. I recommend starting with a single scallop at the center bottom and moving up both sides.

    You can save a little time by using pinking shears or other decorative scallop scissors.NSB – heartfelt doily pinked edges

  3. It’s time to embroider your smaller heart! Consider a simple valentine’s phrase like “love” or “be mine”, or plan to embroider a sweet motif like flowers or hearts. Not sure what to embroider? It may be helpful to trace the small heart onto paper to sketch out different styles.NSB – heartfelt doily sketch
    Using your removable ink pen, plot your decoration on the smaller heart and embroider! I like to use flosses in colors that match the large heart for a cohesive look.NSB – heartfelt doily embroidered small heart
    When complete, rinse out the ink, if applicable.
  4. Layer the two hearts, right sides up, centering the smaller. Using a running stitch, sew the small heart to the large.NSB – heartfelt doily stitch together
  5. If desired, embroider a small motif in each of the scallops, using a color to match the small heart. This is a fun way to mimic or compliment your embroidered motifs in the small heart.NSB – heartfelt doily embroider scallops
    On the back, there will be two visible sets of stitches.NSB – heartfelt doily finished back
  6. Voila! NSB – heartfelt doily finished


3-D Valentine Ornament

  1. Using our templates (NSB heart felt valentines pattern sheet), cut two large hearts from one color of felt and four small hearts from another.NSB – heartfelt ornament cut hearts
  2. Using a sewing machine and thread, or a hand sewing needle with thread or floss, stitch the two large hearts together from center top to center bottom. This will create a total of four ‘arms’ that make up four large hearts.NSB – heartfelt ornament sew large hearts together
    Open between the two layers on each side and fold hearts on seamline.NSB – heartfelt ornament fold on seam
  3. Center one small heart over one of the larger hearts, aligning the bottom point and top dip of the small heart to the seam- or fold-line of the larger heart. Pin the layers together on one side (I like to pin the left side first). Turning the ‘arm’ so your unpinned side is facing away, center a second small heart over the larger heart that now faces up. Pin one side of the new small heart to the large heart, catching the unpinned side of the previous small heart.NSB – heartfelt ornament pin small hearts
    Repeat for all small hearts.
  4. Using a hand needle and embroidery floss that matches the larger hearts, begin sewing through three layers with a running stitch, working from the center top to the bottom around one side of the heart.
    Repeat for all four ‘arms’. You will have four stitched small hearts.NSB – heartfelt ornament repeat for all
  5. If you like, repeating the process of step 4, add an second row of stitches to the inside. Use a different shade of floss for visual interest.NSB – heartfelt ornament second color
    Repeat a third time, with another shade of floss, if you prefer.
  6. Your 3-D valentine is complete! If you want to make it into an ornament, sew a small loop of ribbon to the top center. Otherwise, hand it to someone you love!NSB – heartfelt ornament final

I hope you have enjoyed this tutorial! If hand embroidery is not your thing, consider using puff paint, glitter, sequins, buttons, or even printed fabric to help embellish your valentines!

Have a question or feedback? Please leave it in the comments below!